Showing posts with label Mommy Corner. Show all posts

Mommy Corner: Puzzle Solution


Merry Christmas, the holidays are in full swing and the dust has settled on our present unwrapping adventures.  I have a quick little mommy post for you. 
This is a cute little puzzle that Santa brought to my house for Christmas.  Wouldn’t you know it, there were no pictures under the pieces and the nearly 2 year old was a bit frustrated by the lack of direction when putting the pieces where they belong.

 
No worries, mommy had a quick fix and he was back to puzzle playing in under 15 minutes.  I placed the pieces on the HP All-In-One and ran a quick color copy.
 
I then cut the copies out and used Modge Podge to glue them into the blank spaces.  Once secure I gave them another coat of glue on top and dried the completed puzzle with my blow dryer. 


See nothing major, a quick fix that made my littlest one very happy. 
 
I hope you all enjoyed your Christmas, and may you have a Happy and Safe New Year.

Mommy Urban Legend or Safety Fact?


Today I am going to talk about something serious in Mommy Corner.  But before we begin you know how much I think confession is good for the soul, so first a confession.  Sometimes after my son finishes his breakfast I mix peanut butter and Nutella on a spoon together and let him eat it.  I know, I know, I will probably not be best friends with the woman who sued Nutella for false advertising.  But the way I see it no matter what he has for breakfast an extra shot of protein and a little sweetness in the morning will get him through till lunch.  So there you have it, confessions of this slacker mom.  Whew, I feel better now that I got that off my chest.  Now on to the car seat question.

On a more serious note, I was recently in a car accident.  I’m okay, but can I just take a moment to say how much I hate metered on ramps.  It makes no sense to me, to come to a stop before merging.  Isn’t the whole point of an on ramp to get up to speed so that you can merge fluently with the 60 mph traffic?  Look how sad the "Mom Mobile" license plate looks barely hanging on. Luckily for me I bought two of them in the event that anything ever happen to the first one.


The baby was in the second row of the van safely secured rear facing in his car seat.  Aside from being pretty shook up, I had minimal damage. There was no air bag deployment and I was able to drive the vehicle after the accident.  But all of this got me thinking, should I replace my child’s car seat?
Some years ago I sold one of my firstborn’s car seats on Craigslist and the woman who purchased it asked me if it had ever been in an accident.  I have since heard other moms mention this in conversation.  I immediately got to questioning is this mommy-lore, or is this something I should absolutely do? 

I began my search for answers with Cosco, the company that manufactured the seat.  I was able to find a wealth of information on product selection, proper installation and new advances but I did not see my definitive answer.

Cosco Travel Safety

Next I Googled the question, “Should I replace a child car seat after an accident?” That’s when I came to the National Highway Traffic Safety Administration.  The information that I found was indeed informative.

http://www.nhtsa.gov/people/injury/childps/childrestraints/reuse/restraintreuse.htm

The NHTSA directed me to safecar.com , to the information below. There was no airbag deployment and I was able to drive away from my accident, after considering all of the factors involved in my accident I decided not to replace my car seat. 

http://www.safercar.gov/parents/CrashSeats.htm

However, unlike the car seats I owned before when I am done with this one I will be sure to remove the cover and label it as unusable before I dispose of it.  It is one thing for me to make an informed decision but quite another to donate this car seat when I'm done with it.
So there you have it, my Mommy’s Corner post for today.  I am currently working on a little boy’s room and hope to have some projects to share with you soon.    


Labels & the Lost and Found


Well hello out there, I hope everyone had a happy and safe holiday. Mine was very nice, although after a wonderful Thanksgiving dinner the youngest spiked a fever. To be safe we packed up and went home so we could pamper him in his own space, nothing major just a little sinus.  Plus my sweet and thoughtful mother who saw how upset I was at having to leave sent me home with 2 whole pies. Mm-mmm a pumpkin pie and a pecan pie, what a consolation prize. 

Today I am going to share a little Mommy’s Corner post.  Let’s take a moment and discuss labels, and the lost and found.  My oldest attends a private school where all the kiddies are dressed alike. My sister lives not far from me and her three children attend the school as well.  As you can imagine they spend a great deal of time together and with all the pick-ups, drops offs, and sleep overs uniforms can get quite mixed up. 

Not to mention the jackets, pull overs and sweat shirts that go to school in the morning, but never quite make it home in the afternoon.  I decided this year something had to be done about it.  The solution presented itself with the “sew in” label. 
 
Until I Googled this one I had no idea that they were so affordable.  I envisioned the embroidered tags and putting out a bit of money.  Boy did I have it wrong they are quick and easy to order and so affordable. 
After considering the options I went with The Name Label Company, and ordered some for each of the boys.  They have many different styles and types.

I chose the printed sew in labels, the pirate for my oldest and the baby for the little one.  They are as cute as they are functional. 


They have a ton of picture choices and even options for children with allergies. 

 
They were shipped to me in no time and I gathered up the uniforms to start sewing.  For the white uniform shirts it was straight forward sewing into the collar over the tags.  For the navy pants and pullovers I used white thread through the needle and navy thread in the bobbin.  This gave me a nice clean look inside and out.  

 
They say confession is good for the soul, so I will tell you we had a cold front come through before I sat down to sew.  So in a rush one morning I grabbed a label, folded it in half and stapled it to the tag in a sweat shirt.  I got the idea from all the dry cleaning labels that I find inside our clothes.  So there you have it sometimes and supermom has to improvise. 

Come back later in the week, I will begin the 12 edible gifts of Christmas, plenty of delicious homemade goodness to give to others this holiday season.

Mommy Corner: Nursery Tour


Well it has been a crazy busy week; I had to stay home two days this week with a feverish baby.  Man this two jobs thing is nothing like it was in college, must have had more energy back then.  None the less I did get some quality snuggle time with the youngest, most of which was in his nursery.  So after staring at the walls while I rocked for hours on end, I decided now is the time to give you all a tour. 

Let me start by saying how in awe I am of all the amazing bloggers out there who are incredibly talented when it comes to design.  I don’t think I’ll ever have the nerve to give you guys a full on tour of our entire house, because it is just not ready for its close up.  I have a very eclectic style, and many of the rooms are a mish mash of all the things that make me happy while making our home feel cozy.  I borrow so many wonderful ideas from all the talented blogger/designers out there.  I also love color, lots of different colors.  I wouldn’t say crazy or saturated color, but I am not a fan of white walls decorating.  My boys' rooms are very old fashioned in the sense that I carried out a central theme to the Nth degree in soothing colors that I thought were conducive to happy, well-adjusted children. 
I’m the kind of person who likes to open Christmas presents at Thanksgiving so of course we knew we were having a boy well in advance of the nursery plans.  I didn’t know I was going to be a blogger back then, although I did make a mood board just to show family before they threw me a lovely baby shower. 
 

Because this was my second child traditionally there shouldn’t have been a shower, but because it had been nearly 7 years since I laid a hand on baby gear, they felt a shower was an absolute must.  Everyone was so generous and the shower was beautiful. Look at us, doesn’t this look like a wonderful bunch of hostesses.  I am very blessed when it comes to these ladies.

Let me say this, babies are expensive.  Those boogers cost money and all the baby gear can really put a strain on the wallet.  We have an amazing baby store here called Cullen’s Playland right around the corner from my office and I stopped in frequently to peruse the clearance section. That is where the nursery inspiration began.  Carter’s Bumble there on the shelf, the entire collection 50% off.  And I mean every piece of the collection.  My family purchased the bedding set, bumper, and lamp. I was able to go online at Amazon and picked up the diaper stacker, valence and decals.  That was pretty much the jumping off place.


We had a bed offered to us and I was planning on piecing together a stylish nursery with furniture we had, and maybe look for a changing table, but good fortune smiled on us once again in the form of a sale at Cullen’s.  This Munire Rockport furniture set came with a convertible crib, side rails, 6 drawer chest with hutch, and 5 drawer high boy for the bargain price of $999.99. 


I tell you if we hadn’t been filling out our baby registry the day before I’m not sure my husband would have gotten a full grasp on what a deal that was.  So home with us that went. I should mention here that we split the pieces and put the 6 drawer dresser and hutch in the older boy’s room to give him more storage space and a place to put his TV. Also, I was able to find a few things on Craigslist. The glider was $100, again purchased after we shopped the ridiculous prices of the new glider at the Big Baby Mart, and the changing table $50. I didn't mind mixing the wood tones in this room, however I did mean to paint a couple of the tables in here white. Guess I should have done that before he was born, there would have been more time for it.
This room was a guest room and I had just painted the popcorn ceiling and the walls the year before. So there was virtually no wall prep to change the paint color.  But the floor, that was a different story. This room was in dire need of new flooring.  I was leaning away from carpet, as most people are these days.  I wanted something easy to maintain, and not have to worry about allergens with a new baby.  We decided on laminate and after considering all the options we chose this Hampton Bay Tuscan Red Cherry laminate from Home Depot.   We cut the old carpet into manageable strips and hauled it to the curb through the front door. Then began the arduous task of removing the pad and scraping tons of old glue off the slab.  I was pretty big by then, but don't think I didn't get down on the floor and help do some scraping.


It was affordable, had rich beautiful color and I really loved the texture on this floor. It has a very natural texture without looking man made. We are very pleased with it and we plan to use it elsewhere in the house. 

The paint colors were chosen by the very talented young man at the Home Depot paint counter. 
I told him my plans for two colors.  He told me he couldn’t color match the bed sheets because they were to transparent in the machine. But I kid you not he walked over to the samples and pulled out the two that matched perfectly.  It was like he was some kind of color picking savant.  He chose Behr Misty Surf and Rich Cream, I was thoroughly impressed. I got the idea for the two colors and the stripe from a picture and decided I needed two colors and something cheerful to break up the two, so that is where the decals came in. 


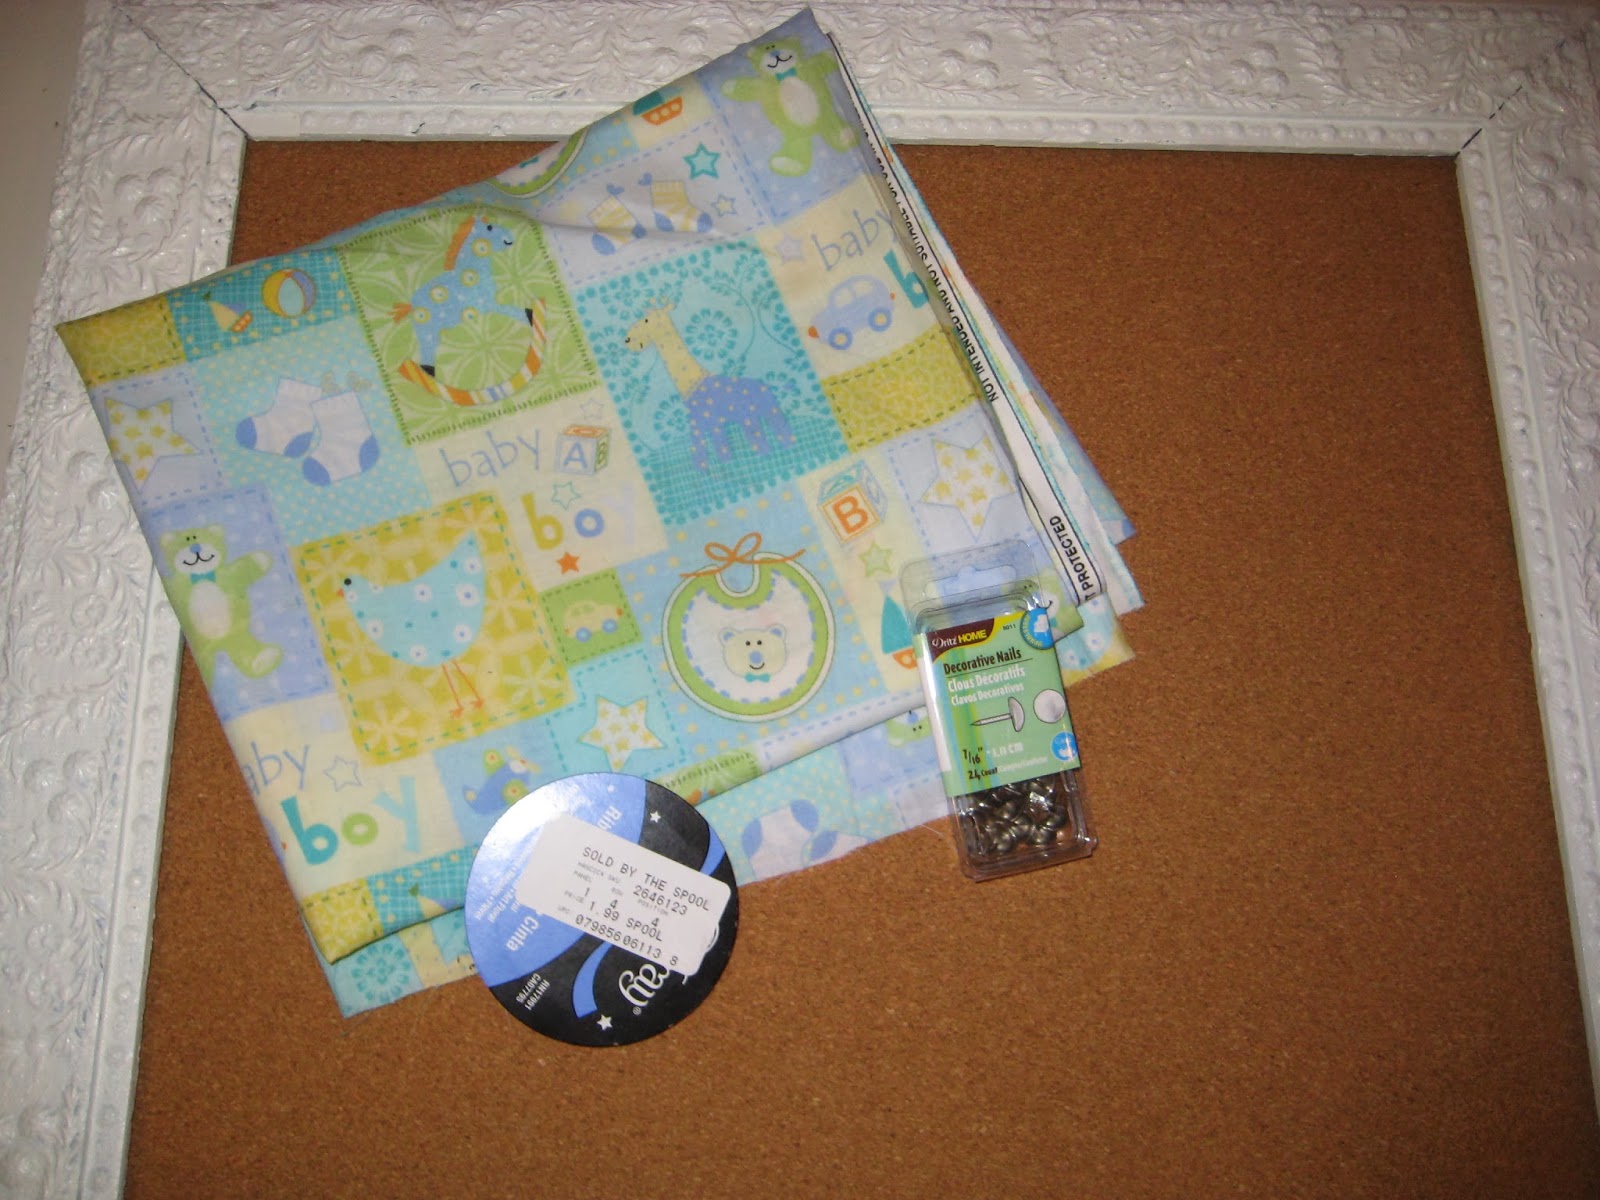
So here you go, our baby boy’s nursery.  It really is one of my favorite places to sit and relax. Have a look, I welcome any thoughts or suggestions.  Thanks for stopping by and come back for this week’s kid friendly recipe. 

Mommy Corner: My Baby Has Been Framed


Good afternoon.  Today I am going to share a nursery project, but this one could be for any room really.  I mentioned early on in the blog that most things have a back story, and this project started with a frame that was came from my grandmother.  Lovingly referred to as Neinee, she painted quite a bit in her retirement.  Because she was raised in a time where you didn’t waste much, she reused canvas boards and frame moldings.  This often made for odd size pictures.  I received a beautiful painting of magnolias after her passing and had the picture custom framed.  Wanting to carry on the tradition of waste not, want not, I kept the frame in case I ever needed it again. 
Then the day came when I figured out a use for Neinee’s ornate frame.  I had a rather large expanse of wall in the baby’s nursery that needed some filling.  I wanted to frame pictures of the baby, but they grow so fast that I needed something more flexible than the traditional frame.  

I began by priming the frame and several others I used for my parents 50th anniversary.  I then painted them all the trim color I chose for the room. 

 
Next I gathered up some supplies: the frame, cork board, material, batting, upholstery tacks, and ribbon. For tools I used a skill saw, stapler and framing square.  I searched high and low for a cork board that had a solid backing, most of them were cardboard, and I found this one atTarget. 
 
 
I removed the molding from the cork board, measured, marked it with the square, and cut it to the size of the frame. 


I then ironed my fabric, cut it to size leaving a 2 inch overhang all the way around and stapled it to the board.  I wrapped the corners similar to that of a package.  I placed the ribbon in a criss cross pattern and stapled it to the back as well.  


Next I fit the board inside the frame and secured it with a few staples.  I then chose the center overlaps to add my upholstery tacks. 
 
 
That’s all there was to it.  I made this the focal point of my frame wall, and surrounded it with baby pictures of all the rest of us.  I think it turned out sweet.
 
This way as the baby grows and I take what I'm sure will be tons of pictures; I can keep the pictures current without a lot of hassle. I will be sure to give you all a full nursery tour real soon.  Thanks for stopping by and be sure to come and see what I have going on next. 

Mommy Corner: All "Wrapped" Up


Mommy Review: All Wrapped Up
So today I thought we’d switch things up and I would talk mommy stuff. I know some of you are not still in baby mode, but you always know someone who is so you can pass these tidbits along to all the bright eyed new mommies out there. 

When I was pregnant with my second son it had been nearly 7 years since I owned any baby gear.  My darling neighbor down the street was new to the mom game and she walked in the afternoons with her newborn swaddled tightly against her chest in one of these.

Moby Wrap Baby Gift
 
She informed me that it was a Moby Wrap and she just loved hers.  It looked comfortable and the baby was secure and often sleeping so I decided I had to have one of those for my own papoose.  I promptly put this item on my Target Registry and received it as a gift.  Long story short, I ended up returning it.  I found that it was in fact comfortable to wear, but really made me quite warm. Also for errands and trips to the grocery store it wasn’t very practical for me to stand in the parking lot and wrap myself in yards and yards of fabric.  I know there are throngs of moms who can’t live without their Moby Wrap and to them I say so glad it works for you, but wasn’t really working for me.

 
Next I found a baby Bjorn carrier at Marshall’s that was discounted and looked as though it might be a winner. It slipped on similar to a back pack and gave more versatile options for a front facing, rear facing front carry and a carry on the back option.  This was reasonable at $39.99 so I swooped it up.  I got it home and was careful to unpack it knowing how specific my needs were, I gave it the ole college try and I just was not as happy with the options.  Having carried my first son around probably longer than I should have, I knew I needed more help with the hip carry. So back in the package this one went and the search continued. 

 
Next I was reading a favorite blog of mine and came across a coupon code for Seven Slings.  Not having to invest serious amounts of money on this option thanks to the promo code I decided to give it a try.  I purchased the Black Magic which was quite stylish. Now I have to say I read all kinds of negative comments about this one, but I was quite pleased with it.  I didn’t follow the height and weight on the sizing chart. I went strictly with the measurement from the top of my shoulder across my body to the hip and despite all the negative reviews mine came in a perfect fit. The fabric has a tiny bit of a stretch to it, and I was a little embarrassed at having spent money on such a simple design but I loved it.  I used this sling for several months blissfully.  The baby often times fell asleep with his head against my shoulder from the rocking motion. So this was a winner. But it did have its drawbacks. As he quickly got heavier and heavier I was uncomfortable supporting his weight on one shoulder and my neck, probably due to a previous “football injury”.  So this carrier became obsolete around seven months.
And the search continued.  I read so many wonderful things about the Ergo; I saw pictures, watched videos, and saw the versatility and decided this was the one I had been looking for.  It had a front; back and side carry option, yay. It was all cotton, could be laundered easily and all the moms on my block were clamoring for them.  This is it, this is the one for me, rejoice! There was just one drawback…the basic ones cost a whopping $115. Wa-wa-wa, disappointment set in.  I couldn’t justify that cost for baby gear when my mom just carried me around on her hip for free. 

 
I scoured the consignment shops and craigslist, but I was unsuccessful in my search. So I kept an eye out and hoped for the best. Several weeks went by and I had the Bjorn in my car and couldn’t find the time to return it.  I finally found the time in my schedule to run the Marshall’s on my lunch and return the carrier that hadn’t worked for me.  I sauntered in and thought to myself I will cruise through the baby section and see if I can find anything to spend my money on before I head back to work, and there it was (cue the choirs of angels). An Ergo in a neutral color shoved amongst the wall of baby gear.  What? Were my eyes playing tricks on me, was there really an Ergo like the one Julia Roberts carried her tot in, here in my favorite discount store?  Yes, yes it was and it was all mine, mine I say for the bargain price of $59.99. Woohoo!!! It is worth noting that there were three and I stood there and considered turning a profit for the other two, but I figured there were two other thrifty new moms out there who deserved to the right to “wear their babies” as my co-worker puts it, for the same great deal I was getting.  So I feverishly grabbed my bargain and marched with a big grin on my face to the register. 

 
Now look how calm and relaxed this mommy looks, this is for me. I took a picture of the carrier I had been driving my hubby crazy over and immediately sent it to him with the caption, “I have won the Ergo Lottery.” He replied. "good job honey," and celebrated with me because he loves me and knows how important the little victories are.  I carry my prize in a cloth bag and often move it from car to car in the event that I need to pop out with my sweet angel and get a few things done hands free.  So there you have it the Ergo story and baby gear review.