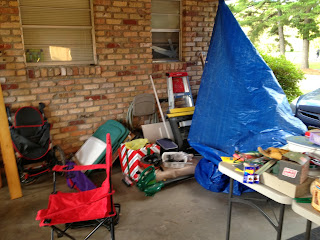
While I was dropping off recycling several people pulled up to our home and asked my husband if we were having a garage sale. He ended up having to hang a tarp across the carport after the 6th or 7th would be customer. As you can see we had quite a hodge podge of things stashed in this seemingly small room.
Later that day, after the items were sorted into piles, we strolled into Lowe's with a materials list for two 1/2 inch sheets and one 3/4 inch sheet of plywood, and several 8 foot pieces of 1x2's (I guessed, because it never hurts to have extra 1x2's hanging around). I hit the hardware aisle for a couple of boxes of different length wood screws; what the heck, I'd have the perfect place to store what I didn't use. Not wanting to bring out my table saw I chose to have the sheets of plywood pre-cut in the lumber department. I had them rip all 3 boards to 22" the depth I chose for the shelves. This was a tremendous time saver for me. Our youngest was only 5 months old and ripping plywood usually requires 2 pairs of hands, this way it was a one
Home with all my goodies and the room cleaned out I began by determining the height of the shelves. I measured the length and width of my plastic containers to determine the depth. I knew I wanted deeper shelves on this side of the room because the opposite side already had narrow shelves that were perfect for paint and small storage items. The shelves are 22 inches deep and 45 inches wide. The top shelf is 64 inches across and they are spaced 24 inches apart from the floor to the ceiling. I knew I wanted a tall space against the wall for long items, and a single shelf across the top to lend stability and give me more flexible storage options. I located the studs in the walls and marked where I needed to screw my supports.
The top shelf is where I used 3/4 inch plywood for strength and stability. The two lower shelves were 1/2 inch plywood; they were plenty strong enough for what I planned to store. This was a fairly easy build, although I did have to put a few extra short supports to anchor my vertical piece to the only studs I could find. But I was more concerned about stability than cosmetics so I was okay with that.
The last thing was to load the room back in with all of the things I wanted to keep. I made a trip to the Dollar General for the first round of small containers, and then to the Big Lots of the larger containers. Both of these stores are dangerously close to my house, if you know what I mean. I wanted everything to be something I could see through without having to open them up even though I planned on labeling them. Oh, and I even carved out a storage solution for my hubby's golf clubs. More on that later.
Maybe one day soon it will look more like this...
.JPG)
.JPG)
.JPG)
.JPG)
1.jpg)


No comments:
Post a Comment
If you have trouble commenting on this blog, please be sure to like the Marta On a Mission page on Facebook. Comments are always welcome. Thank you for visiting and come back soon.
https://www.facebook.com/martaonamission