Hey Howdy everybody.
I am posting a quick fence fix today to keep the puppy dog from running
the roads. I talked about the critter
here in this post, but we needed some additional fence fixes and this time a
little more attractive and usable.
The
little powerhouse peeking out from the ferns in this picture is Harry. He is a rescue dog that we adopted a couple
of years ago, and he is quite athletic.
He has the ability to leap small fences in a single bound.
.jpg)
Months back we built a fence to fit the riding mower in the back yard, detailed here. Real carpenters might want to turn away because this is about to get ugly. I had a problem with the slope of the grade and water runoff and at the end of a long day of gate building I cut the bottom with a reciprocating saw. I know, I know not exactly the right way to do it, but I stand by my decision as a DIYer. It was late, I was tired and losing the light so I did it. Needless to say we had an ugly gap in the bottom of the gate that we filled in with a random 2x4 and a few bricks.

The problem is Harry is steadfast in his quest for freedom to chase buses, garbage trucks and unleashed dogs. So here is the engineering that was born out of my DIY brain.
First I purchased and fence board and cut it the width of
the gate.

Next I clamped it down to my work table and used and hole
saw to cut a few drainage holes along the bottom.

Then I marked where the board would meet the fence boards
behind it and sketch out a track. I drilled pilot holes and used the skill saw
to cut tracks on both sides.

Once they were sanded and somewhat smooth, I assembled the
dog catcher on the gate. I drilled holes through the existing fence boards.

I attached my contraption in a bolt-washer-board-board-washer-wingnut
fashion.

The idea being that I could loosen the wingnut and slide the
board up, then tighten to hold in place while I open and close the gate.

I took the picture after I was finished, two weeks worth of weather have yellowed the board to the same hue as the others and the fix seems as though it belongs there. Maybe one day I will re-grade the yard on this side of the house but for now this works beautifully at keeping Harry in, and others out.
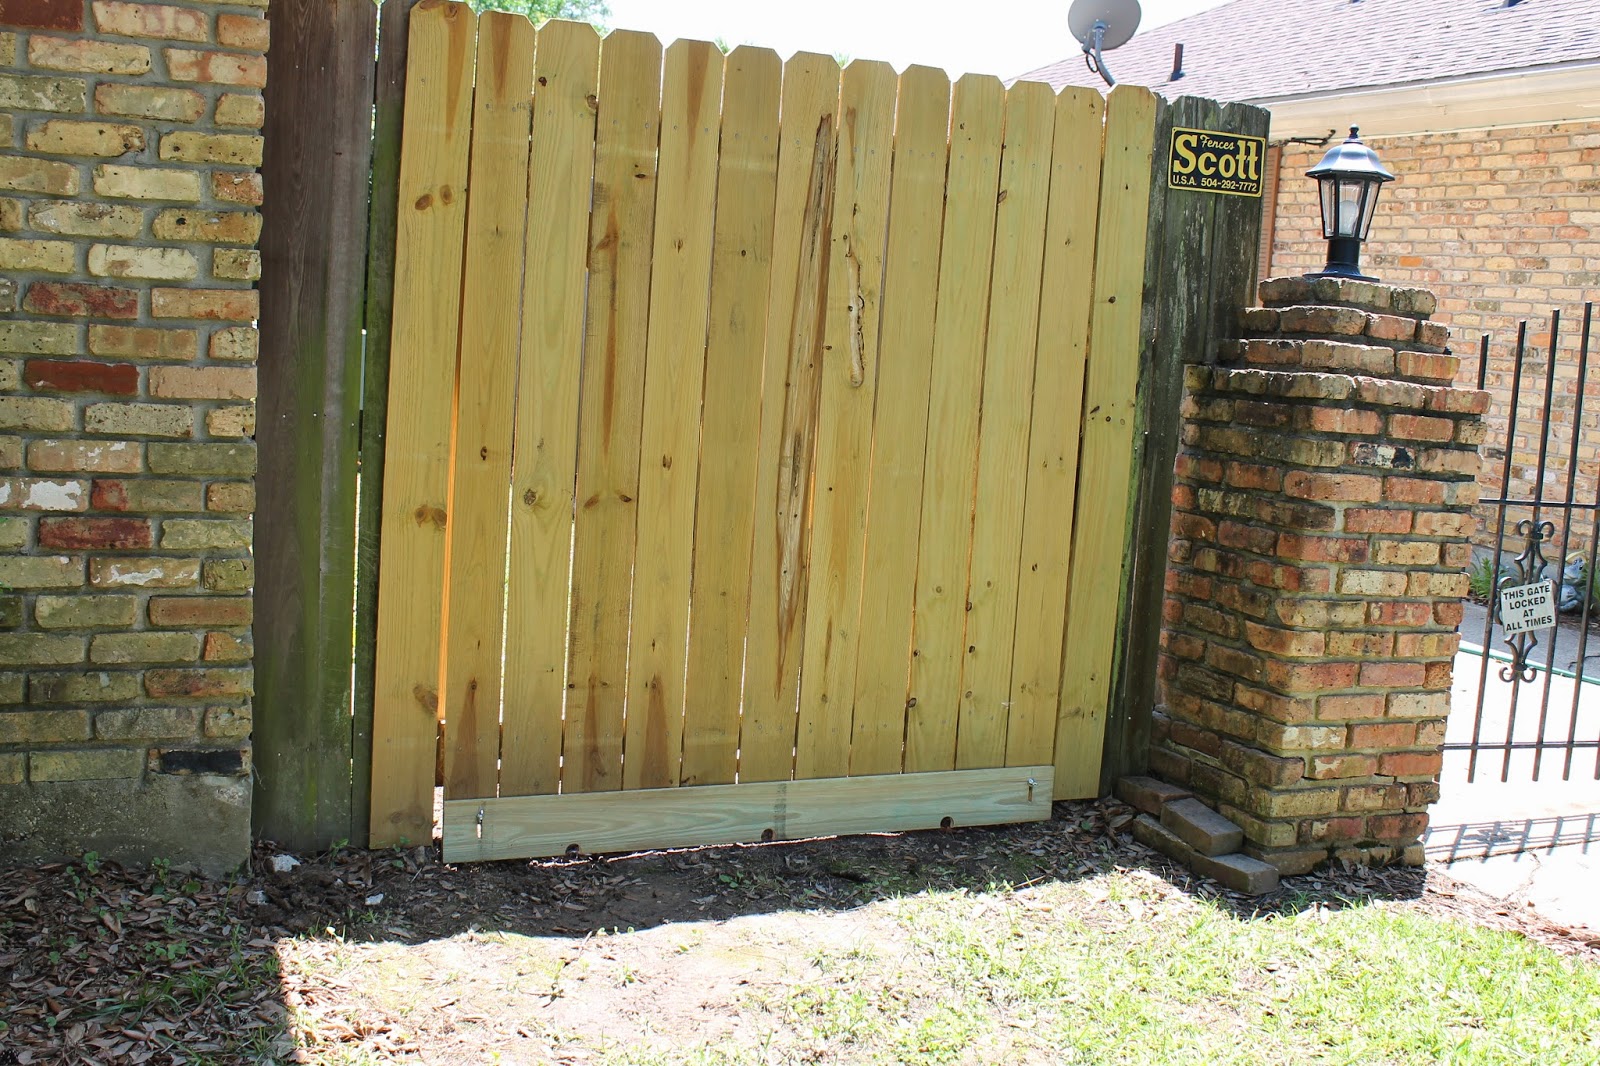
It works a like a charm, and I have used it several times
with no problem. I take turns cutting
the grass with the yard man and he told me he saw the new board, but asked me
why I cut the slits in the boards? He had an AHA moment when I explained it was
so he could move the board up and down without removing it. So there it is my critter catcher for the front of the
house.
No comments:
Post a Comment
If you have trouble commenting on this blog, please be sure to like the Marta On a Mission page on Facebook. Comments are always welcome. Thank you for visiting and come back soon.
https://www.facebook.com/martaonamission